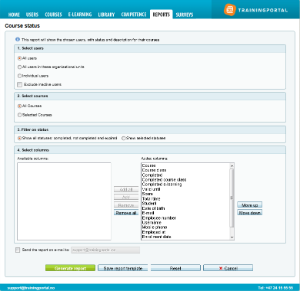
06. Course status
8 people found this article helpful
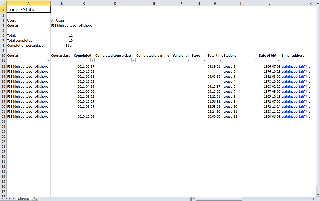
This report shows the selected users, with status and descriptions of the courses they are enrolled in.
In the tab "Reports" click on "Course status".
- Select Users:
- "All users"
- "All users in these organizational units":
- Click "Select" to bring up the organizational structure.
- Locate the organizational unit that you want to generate a report for and click on it. Repeat if you want to include more organizational units. Click on "Remove" if you want to remove a unit from your selection.
- "Individual Users"
- Click on "Select users".
- Select the users in the list, or search for users using a simple or detailed search. You can choose to view the users in a list or by organizational unit. You can at any time click "Selected users" to see all the users you have selected.
- Click "Save" after selecting the users you want to generate a report for.
- To exclude inactive users from the report, tick the box.
- Select courses:
- "All courses"
- "Selected Courses":
- Click on "Select courses".
- Check the list, or search for courses. You can at any time click "Selected courses" to see all the courses you have selected.
- Click "Save" after selecting the courses you want to generate a report for.
- Filter on status:
- Show all default statuses which are completed, not completed and expired, or
- Select the statuses to be included (more than one can be selected):
- Not completed
- Completed: Select from and to dates in the format YYYY-MM-DD or click on the dates in the calendar.
- Expired (users who must repeat the course): Select from and to dates in the format YYYY-MM-DD or click on the dates in the calendar.
- Courses which will expire within a certain timeframe: Select the time frame from the drop-down menu.
- Select columns:
- All selections under "Added columns" is information provided in the report. If this field is empty, it will not be possible to make a report.
- To remove columns from the report, mark the column and click "Remove". The column is being moved to "Available columns".
- Note the columns for the users comments and competence description.
- The column on top under "Added columns" is the first column in the report.
- To move a column up or down, mark it and click on "Move up" or "Move down". By doing this the report can be adjusted as needed.

5. Click the "Generate" button to generate the report.
- To get the report sent to your e-mail, tick the box. For big reports it is better to get the report sent to you e-mail, so you don’t have to wait until the report is being generated.
- Click on Reset to make a new report.
6. Read more here about how to make reports as templates and to set up a subscription.
Are you a course provider?
If you would like to see all users enroled to a course, please do the following:
- Go to the tab "Courses".
- Go to the course, and to the tab "Users".
- Click on the "Print list" button.
- The list will be downloaded in Excel-format.

